Showing posts with label #cards. Show all posts
Saturday, December 13, 2014
30 Days of Holidays with Xyron Advent Calendar
Merry Christmas!!! Can you believe it, we are days away from the big day? I wanted to share with you a fabulous card that will really knock the mittens off of whom ever receives this card. It is really easy I promise. So let me tell you how to make this card!!!
1. You are going to pick and choose 2 pattern papers and color of cardstock to coordinate. Cut each piece to fit your measurements.. Above I have a 5x7 card! So in the pattern paper I cut the Green at 3.5 x 6.75 and the stripe at 1.5 x 6.75. run EACh PIeCE through your XYRON Creative Station MAX!! I love this Machine!!! Peel and still and BAM!!! you are a card making DIVA!!
To cover the seam between the two I ran a piece of ribbon down the middle using some Glossy Accents to adhere it.
Now for the main attraction. The Wreath!! Super Simple and Sooo Easy to make!!!
First you want to get about a dozen of what is called " clear Wheat sprays" you can find them here at Creating with Details Store.
Take the Wheat Sprays and place them in a ziplock bag. Add several drops of Alcohol Inks in shades of green to the bag and smush around until all wheat sprays are coated. Dump out onto a paper towel an let fry for only a few mins. super fast and easy!!!
Then begin using your hot glue and bend the sprays into a wreath style as you see above, I added red jewels as berries. To Finish off the wreath you can simply glue it to the card or you can make it into a removable ornament. The Choice is yours!!!
I hope this simply and festive card gives you a new take on making wreaths for the holidays!!! You will be making tons of these!!!
Again thank you so much for stopping by,
Your Professional Crafting Designer/Educator
Angela Holt
Thursday, November 6, 2014
Xyron and Paper House Blog Hop
Hey Crafty Peeps!! This week the Xyron Design Team and I is celebrating the Great Outdoors with our friends at Paper House - tune in every day for projects, tutorials and giveaways that will make you think about "outdoorsy" paper and embellishments in a whole new light!
I have brought to you a day a quick and easy Card tutorial that gives you that feeling on a Cold Snow Topped Forrest. So lets get started with the tutorial!!
Products Used:
Xyron Creative Station 9
Xyron Mega Runner
Foam Tape
Paper House Productions "Roughin It" 3D sticker
Paper House Productions Outdoors Diecut Sticker Pack Used the Deer
Paper House Productions Camping 2 Cardstock Stickers
Paper House Productions Great Outdoors Paper Pad
Brown and Black Cardstock
Metal Embellishments
You are going to pick a great background paper from the Great Outdoors Paper Pad. I chose the Forest scenery. You are then going to run the Brown piece of cardstock and the forest print through the Xyron Creative Station. As you can see from the photo, I also cut out and ran through the Creative Station some border pieces that were also in the paper pack that I will use later.
Above I have cut out with my Silhouette Cameo some Pine trees and pine branches. I colored these using 3 different color inks to give it that real effect.
Then simply pulling from the stickers from Paper House Productions and the cut outs, I made a scenery of a forest. I used some snow flocking and my glossy accents to create snow tipped trees that you see below in the finished project.
As you can see, this just looks like a snowy scene that makes you want to be snuggled in a cabin with a warm cup of coco on a cold winter day! The odd trees you see in the background are from the Paper House production sticker packs and I use elements from these packs to create the sign!!!
If you are loving this card as much as I do, then head on over to the Paper House blog every day this week for even MORE great ideas - and they are giving away some of your favorite Xyron goodies as well! We want to share some of the Paper House products we are loving with you - so all week long we'll be having giveaways here on our blog as well. Just leave a comment and one lucky winner will win a fabulous prize!!!
I want to wish everyone a fabulous Crafty Day!!
Your Xyron Designer
Angela Holt
Saturday, October 4, 2014
Spellbinder and Xyron Design Team Project.
Hey Crafty Peeps!!! Cool air has rushed in here in Tennessee. The smells of Tobacco Barns and the vibrant colors of mums and pumpkins decorate the scenery. This has put me in the Fallish mood to bring to you a fabulous Card tutorial Using dies from Spellbinders and of course my Favorite Adhesive Xyon!! Below is a Step out tutorial I have created for you to show you how the process of this card came about. So come set a spell get warm and get inspired!!!
Supplies:
Spellbinders Nestabilities Majectic Squares
Xyron Creatopia Shapez Die By Spellbinders
Xyron Create Sticker Max
Xyron Create a Sticker 3"
Cardstock
Glitter
Pop Dot
Ribbon
Vintage Photo which is provided below!
Step 1 As you see in the photos above. You are going to prepare your image and your frame for the image. For the Frame I cut it out with black cardstock. Ran it through my Xyron Sticker Maker 3" then I added Black Glitter then I ran it back through so I could make it a sticker to be placed around the photo. To prep my photo I ran it through the same Sticker Maker and placed it on a piece of Chipboard for added strength. The Frame is from the Xyron Creatopia Shapez Die By Spellbinders
Step 2: you will cut out 3 styles of paper. From the photo above, I used a base cardstock, the corrugated piece and a pattern piece. They all measure. Base Card is 5 1/2 x 5 1/2 the Corrugated is 5 1/8 x 5 1/8 pattern piece 4 3/4 x 4 3/4. Run the Corrugated piece through the Xyron Create a Sticker Max.
Step 3: While the corrugated piece is still on the sticker paper, Use the cool NEW tool set from Core'dinations called Sand it Set and make the edges rough and torn.
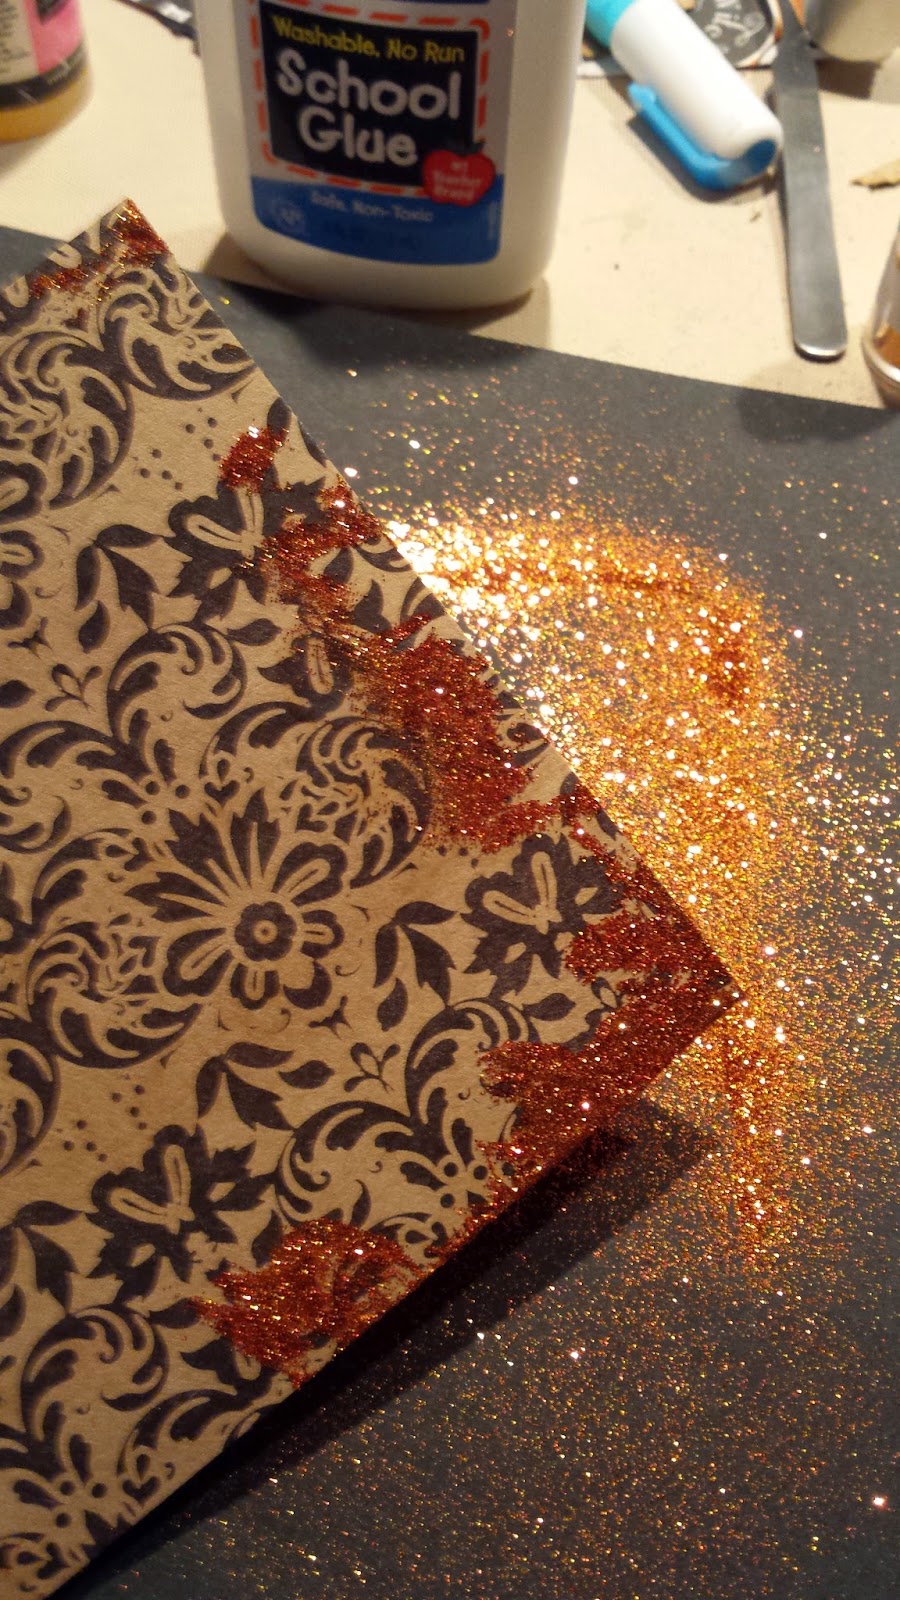
Step 4: Cut out from using the Spellbinders Majestic Squares dies in black cardstock. I used Silver Rub n Buff to give a old look. Pop Dot your photo onto this piece. and begin layering and added embellishements!! As see above I used Orange Glitter to bring out the Pattern Piece and to give the card more sparkle! Dont forget to run the pattern piece that is now glittered through your Xyron Create a Sticker Max to make it easy to peel and stick to build the card. SEE PHOTOS BELOW!!
The Haunted photo I used:
I want to wish you a fabulous HAPPY HALLOWEEN!!! I hope this card has given your inspiration to create some awesome and festive cards for all your friends this season!! Please be sure to comment below and let me know what you think!!! Again thank you for stopping by for another fabulous creation,
Your Professional Crafting Educator/Designer
Angela Holt
Supplies:
Spellbinders Nestabilities Majectic Squares
Xyron Creatopia Shapez Die By Spellbinders
Xyron Create Sticker Max
Xyron Create a Sticker 3"
Cardstock
Glitter
Pop Dot
Ribbon
Vintage Photo which is provided below!
Step 1 As you see in the photos above. You are going to prepare your image and your frame for the image. For the Frame I cut it out with black cardstock. Ran it through my Xyron Sticker Maker 3" then I added Black Glitter then I ran it back through so I could make it a sticker to be placed around the photo. To prep my photo I ran it through the same Sticker Maker and placed it on a piece of Chipboard for added strength. The Frame is from the Xyron Creatopia Shapez Die By Spellbinders
Step 2: you will cut out 3 styles of paper. From the photo above, I used a base cardstock, the corrugated piece and a pattern piece. They all measure. Base Card is 5 1/2 x 5 1/2 the Corrugated is 5 1/8 x 5 1/8 pattern piece 4 3/4 x 4 3/4. Run the Corrugated piece through the Xyron Create a Sticker Max.
Step 3: While the corrugated piece is still on the sticker paper, Use the cool NEW tool set from Core'dinations called Sand it Set and make the edges rough and torn.
Step 4: Cut out from using the Spellbinders Majestic Squares dies in black cardstock. I used Silver Rub n Buff to give a old look. Pop Dot your photo onto this piece. and begin layering and added embellishements!! As see above I used Orange Glitter to bring out the Pattern Piece and to give the card more sparkle! Dont forget to run the pattern piece that is now glittered through your Xyron Create a Sticker Max to make it easy to peel and stick to build the card. SEE PHOTOS BELOW!!
The Haunted photo I used:
I want to wish you a fabulous HAPPY HALLOWEEN!!! I hope this card has given your inspiration to create some awesome and festive cards for all your friends this season!! Please be sure to comment below and let me know what you think!!! Again thank you for stopping by for another fabulous creation,
Your Professional Crafting Educator/Designer
Angela Holt
Thursday, September 25, 2014
Xyron/ Anna Griffin Hop!!
Coming to you all as your fabulous Xyron Designer. Xyron Designers and Anna Griffin INC. are featuring wonderful projects using Xyron Products and amazing paper and embellishments from Anna Griffin. What could be more perfect?
I have a great project for you with a video tutorial!!! Yep!!! This project is a handmade card tutorial that is so dimensional. Lots of layers and elements makes this for a major Mixed media card!!!
Watch the video below and check it out!!! LIKE SHARE AND SUBSCRIBE!!!
Your Professional Crafting Designer/Educator
Angela Holt
I have a great project for you with a video tutorial!!! Yep!!! This project is a handmade card tutorial that is so dimensional. Lots of layers and elements makes this for a major Mixed media card!!!
Watch the video below and check it out!!! LIKE SHARE AND SUBSCRIBE!!!
Your Professional Crafting Designer/Educator
Angela Holt
Tuesday, July 22, 2014
3Birds/HSN promotion
Woo Hoo I'm oober excited!!! It is an amazing 24 hour Craft celebration over at HSN!!! It is an all day event that is jammed packed with amazing products to make your crafting easy, beautiful and master pieces.!!
3Birds and Xyron will be on 24-Hour Craft Day on HSN Today so be sure to check out the NEW and amazing Products they will be showcasing. You can order the featured products in this event by visiting the HSN website!! Here are some quick links:
3 Birds Studios: ORDER HERE
Xyron: ORDER HERE
Here is my project that I created using 3 Birds products and Xyron Products!!! ALSO>>>>>>>
Thanks for stopping by!!! So grab you favorite drink and snacks and settle in for an amazing Creative craft event. If you cant be there, be sure to set the recording!!!!
Your Professional Crafting Designer/Educator
Angela Holt
www.angelaholtdesigns.com
3Birds and Xyron will be on 24-Hour Craft Day on HSN Today so be sure to check out the NEW and amazing Products they will be showcasing. You can order the featured products in this event by visiting the HSN website!! Here are some quick links:
3 Birds Studios: ORDER HERE
Xyron: ORDER HERE
Here is my project that I created using 3 Birds products and Xyron Products!!! ALSO>>>>>>>
THIS LAYOUT WILL BE LIVE ON HSN!!! SO BE SURE TO CHECK IT OUT!!!
Products Used:
Prima Marketing Chalk Edger in Colors "Old Rose, Cold Ice, and Moss Lawn. Order the 40 count Prima chalk edger Set through me at my store for an amazing unbeatable price!!! ORDER HERE
Various Flowers, laces and trims
Pop Dots
Hot Glue
This beautiful Baby is of my Friend Stephanie Nash. She is like a sister to me and we are life long friends and crafters!!! I thought this 3 Birds collection brought out the color blocked photo I created on my Adobe Photoshop Elements Program.
Be sure while your watching to look for these cards I created using Xyron products such as the Xyron Mega Runner and the Creative Station I mentioned above!!! These are amazing products and must haves in your crafting tools!!
Your Professional Crafting Designer/Educator
Angela Holt
www.angelaholtdesigns.com
Tuesday, July 1, 2014
Lawn Fawn/Xyron Blog Hop!!
Hello Crafty Peeps!! Angela here. I want to thank you for stopping by my blog to see what fabulous creation I made using the Summertime Charm Stamp Set. I think it turned out pretty cute!!! What is even more fabulous is there is a complete VIDEO TUTORIAL for you to follow my process!!! Woop Woop!! So please visit the link below to my video!!! Be sure to visit all the Designers Links to get inspired with other amazing projects using Lawn Fawn and Xyron Products!!! I dont know where I would be without my Xyron Products!!! Let me know if you have any questions!!!
Visit here to being the blog hop if you have started here!! http://aintshecrafty.blogspot.com/
Or you can visit the Facebook Page at : https://www.facebook.com/xyroninc
Product Used:
Xyron Sticker Maker Max
Xyron Mega Runner
Xyron 1.5 inch Sticker Maker
Lawn Fawn Summertime Charm Stamp Set
Cardstock
Ink
Pattern Paper
Hot Glue
Watch Video Here:
Monday, May 19, 2014
Paper House& Xyron Blog Hop!!
Join us for 5-day journey next week as we host a "Travel the World" co-blog hop with Xyron! RSVP to our Facebook event to stay up on all the details!
VISIT HERE TO THE EVENT FOR CHANCES TO WIN AND MORE!!!
Super excited to bring to a wonderful creative 3D card idea using amazing products from Paper House Productions and Xyron!!! Below is a step out tutorial I have created to share with you how I made my "Travel to France" 3D card!!! Be sure to visit the link above to being this awesome creative journey!!! Today I take you to France!!!!
Products Used
1 Sheet of Color Card Stock
Paper from the Paper House Generations Paper Pack
3D Paper House Scenes Stickers Paris
Paper House Cardstock Stickers France
Xyron Mega Runner
Pop Dots
Step 1: I used the Side Step card tutorial from a wonderful blog called "Out Daily Bread" Find the tutorial here Then I used the 3D stickers Paris and used a product called UN-DO. This product can be bought at your local craft store and or wal-mart. It is an adhesive removal product that will leave your images and papers untouched and clean while removing adhesive, pop-dots and more. So I separated all of the layers of the sticker!! Find a video review on this product on my youtube channel HERE
Step 2: Get the paper from the Generations Paper Pad and select the tree background. I fussy cut the some of the grass scene and tree scene from the paper and places them onto the card bases using my Xyron Mega Runner.
Step 3: Begin stacking the elements from the separated 3D sticker Paris and using the Xyron Mega Runner adhere them to the card as you see above. Also you see above me using the Paper House Cardstock Stickers (France) and adding the elements as the sign and the house. I them took additional pop-dots and fussy cut more grass and layered the pieces in front of the house.
Step 4: From the same Paper House Cardstock Sticker Set, I chose the title France and fussy cut it out on a piece of cardstock and them pop-dotted the piece to the card!!!
That is it!!! This card makes me feel like I'm in France and could have not done it without some amazing products!!!!
I hope you embark on this journey with us and gather some amazing inspiration from the designers all week!!! I super excited and I THANK YOU SO MUCH!!! for stopping by for another great and inspiring tutorial!!!!
Until Next Fabulous Project
Your Designer and Craft Educator
Angela Holt
Subscribe to:
Posts (Atom)